


Maintaining your dog’s paw health is paramount to their overall well-being, and a crucial aspect of this care involves regular nail trimming. Neglecting this seemingly simple task can lead to a cascade of problems, ranging from discomfort and altered gait to more serious issues affecting their musculoskeletal system. While the thought of clipping your dog’s nails might evoke anxiety in both pet owners and their furry companions, understanding the proper techniques, utilizing the right tools, and employing calming strategies can transform this potentially stressful experience into a manageable and even positive routine. This comprehensive guide will delve into the intricacies of how to trim a dog’s nails without hurting them, providing you with the knowledge and confidence to ensure your beloved canine’s paws remain healthy and happy.

Understanding the Anatomy of a Dog’s Nail: Avoiding the Quick
Before embarking on the nail-trimming journey, it’s essential to understand the anatomy of a dog’s nail. Unlike human nails, a dog’s nail contains a living part called the “quick.” This pinkish area, visible in dogs with lighter-colored nails, houses blood vessels and nerves. Cutting into the quick is not only painful for your dog but will also result in bleeding. This negative experience can create a lasting aversion to nail trimming, making future attempts even more challenging.
The hard, outer layer of the nail surrounding the quick is what needs to be trimmed. The goal of safe nail trimming is to remove the excess growth of this outer shell without ever touching the sensitive quick. With regular trimming, the quick will gradually recede, allowing you to trim the nails shorter over time, which is the ideal length for your dog’s comfort and health.
For dogs with dark or black nails, identifying the quick visually can be more challenging. In these cases, you’ll need to proceed with extra caution, trimming small amounts at a time. A helpful indicator is the appearance of a chalky white ring on the cut surface of the nail as you approach the quick. Once you see this ring, it’s time to stop trimming that nail.
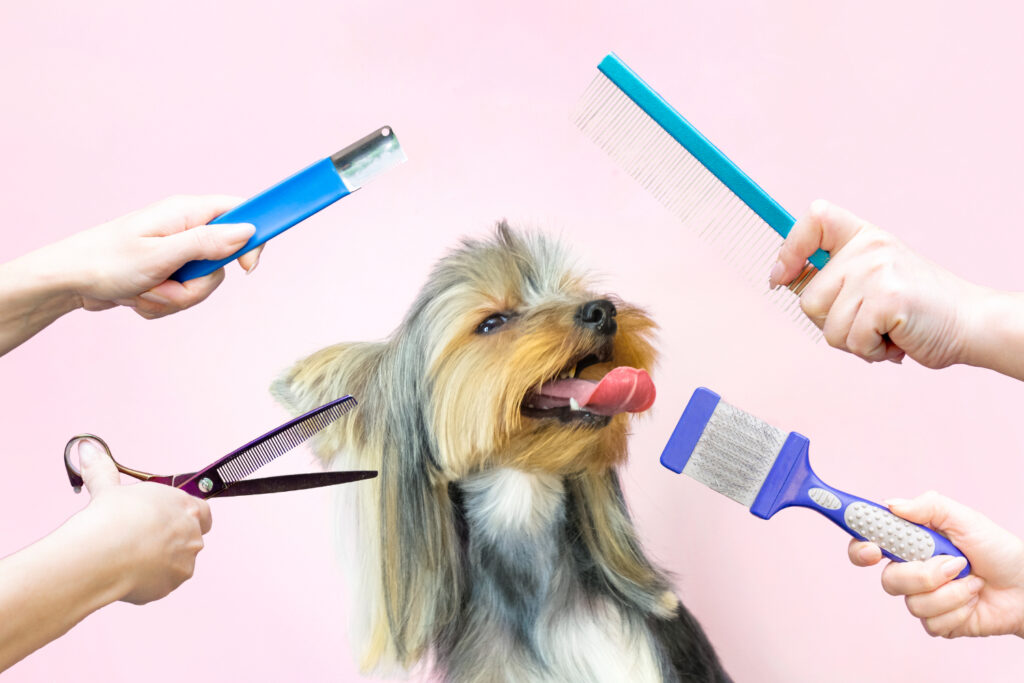
Essential Tools for Safe Nail Trimming:
Having the right tools is crucial for a safe and effective nail-trimming session. There are several types of dog nail trimmers available, each with its own advantages and disadvantages:
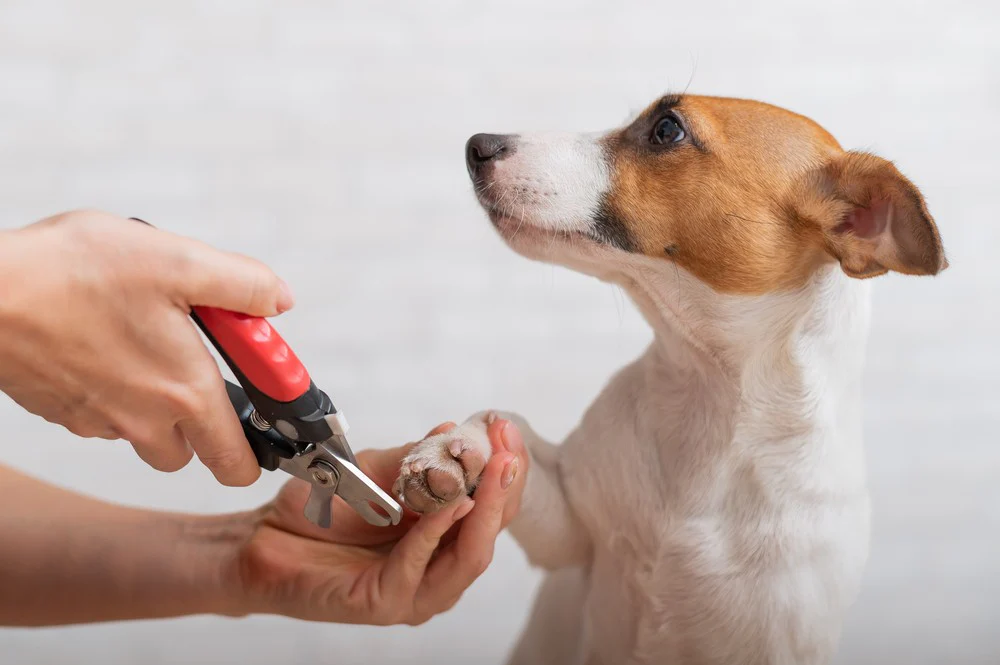
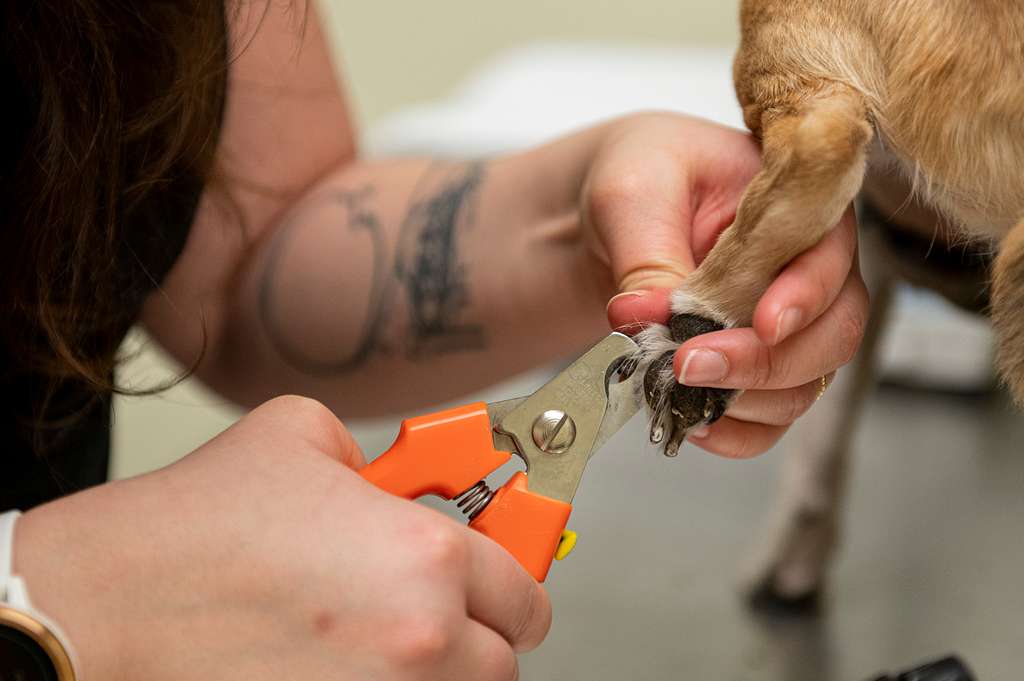
- Scissor-Type Clippers: These clippers resemble small scissors with curved, notched blades designed to grip the nail. They are generally easy to use and provide good control, making them a popular choice for many dog owners. Look for high-quality, sharp clippers to ensure a clean cut and prevent crushing the nail.
- Guillotine-Type Clippers: These clippers have a hole through which you insert the tip of the dog’s nail. When you squeeze the handles, a blade comes down to trim the nail. While they can be effective, it’s important to position the nail correctly to avoid cutting the quick. Some owners find these less intuitive to use than scissor-type clippers.
- Rotary Grinders (Dremel Tools):
These electric tools use a rotating abrasive head to gently file down the dog’s nails. Grinders offer a more gradual approach to nail trimming, reducing the risk of accidentally cutting the quick. They are particularly useful for dogs with thick or brittle nails and can create a smoother finish. However, some dogs may be sensitive to the noise and vibration of the grinder, requiring careful acclimatization.
In addition to the primary trimming tool, it’s highly recommended to have styptic powder or another pet-safe clotting powder readily available. This powder can quickly stop bleeding if you accidentally nick the quick. Simply apply a small amount of the powder to the bleeding nail with a cotton swab or your finger.
Creating a Calm and Positive Environment for Nail Trimming:
For many dogs, nail trimming can be a source of anxiety. Therefore, creating a calm and positive environment is paramount to ensuring a stress-free experience for both you and your furry friend. Here are some strategies to help your dog feel more comfortable:

- Early Acclimatization:
The earlier you introduce nail handling and trimming to your puppy, the more likely they are to accept it as a normal routine. Start by gently touching and holding their paws frequently, even when you’re not planning to trim their nails. Reward them with treats and praise for their calm behavior.
- Positive Association: Associate the nail-trimming tools and the process with positive reinforcement. Let your dog sniff the clippers or grinder, and immediately reward them with a high-value treat and enthusiastic praise. Gradually progress to touching their paws with the tools, squeezing the clippers (without trimming), or turning on the grinder briefly, always followed by positive reinforcement.
- Desensitization and Counter-Conditioning: If your dog already has a negative association with nail trimming, you’ll need to employ desensitization and counter-conditioning techniques. This involves gradually exposing your dog to the stimuli (e.g., the clippers, the sound) at a low intensity while pairing it with something they love, such as high-value treats or a favorite toy. The goal is to change their emotional response from fear or anxiety to positive anticipation.
- Comfortable Positioning: Find a comfortable position for both you and your dog. Some dogs prefer to sit in your lap, while others are more comfortable standing on a stable surface or lying down. Experiment to find what works best for your dog. Ensure you have good lighting so you can clearly see their nails.
- Distraction Techniques: Employing distractions can help take your dog’s mind off the nail trimming. Licking peanut butter from a silicone mat or enjoying a special chew toy can keep them occupied during the process.
- Short and Frequent Sessions:
Instead of trying to trim all of your dog’s nails at once, break the task down into short, manageable sessions. Even trimming just one or two nails at a time can be a significant step forward, especially if your dog is anxious.
- Positive Reinforcement:
Throughout the entire process, use a calm and reassuring voice and offer plenty of praise and treats for cooperative behavior. End each session on a positive note, even if you only managed to trim a few nails.
- Patience and Consistency:
Building a positive association with nail trimming takes time and patience. Don’t get discouraged if your dog doesn’t become comfortable overnight. Consistency is key. Continue with regular, positive interactions and gradual introductions to the trimming process.
Step-by-Step Guide: How to Trim Your Dog’s Nails Safely
Once your dog is reasonably comfortable with having their paws handled and the sight and sound of the trimming tools, you can proceed with the actual nail trimming. Follow these steps carefully to ensure you how to trim a dog’s nails without hurting them:
- Prepare Your Dog:
Ensure your dog is in a comfortable and relaxed position. Have your chosen trimming tool and styptic powder readily accessible.
- Isolate the Paw and Toe:
Gently pick up one of your dog’s paws. Use your thumb to gently push the toe pad up and backward, while using your forefinger to secure the top of the toe just above the nail. This action will help extend the nail and make it easier to see. Ensure no fur is obstructing your view of the nail.
- Identify the Trimming Point: For dogs with light-colored nails, locate the pink quick. You want to trim just the white, hard part of the nail, leaving a safe distance from the quick. For dogs with dark nails, trim in small increments. Look for the chalky white ring on the cut surface as an indicator that you are approaching the quick.
- Trim the Nail:
Using your chosen clippers, make a clean, confident cut straight across the tip of the nail. Avoid angling the cut, as this can leave sharp edges. If using a grinder, gently touch the rotating head to the nail and grind down the tip in small, controlled movements. Grind across the bottom of the nail and then carefully smooth any rough edges from the tip.
- Don’t Forget the Dewclaws:
Remember to trim the dewclaws, which are located on the inner side of the front paws (and sometimes the hind paws). These nails don’t typically touch the ground and can grow quite long if not trimmed.
- Observe Your Dog’s Reaction:
Pay close attention to your dog’s body language throughout the process. If they show signs of discomfort or anxiety, take a break and offer reassurance and treats.
- Repeat for All Nails:
Continue this process for all of your dog’s nails, one paw at a time.
- Reward and Praise:
After you’ve finished trimming the nails, reward your dog with enthusiastic praise and a high-value treat. This positive reinforcement will help them associate the experience with something pleasant.
Troubleshooting Common Challenges:
Even with careful preparation, you may encounter some challenges when trimming your dog’s nails:
- Accidental Nicking of the Quick:
If you accidentally cut the quick and the nail starts to bleed, don’t panic. Apply a pinch of styptic powder to the bleeding area. The bleeding should stop within a few moments. Speak to your dog in a calm and reassuring voice. While this can be upsetting, try not to convey your anxiety to your dog.

- Excessive Squirming or Resistance:
If your dog becomes overly agitated or resistant, stop the trimming session. Try again later when they are more relaxed, or break the task down into even smaller steps. Consider seeking assistance from a partner or using distraction techniques more effectively.
- Fear of the Tools:
If your dog is particularly fearful of the clippers or grinder, go back to the desensitization and counter-conditioning steps. Spend more time associating the tools with positive experiences without attempting to trim their nails.
- Uncertainty About Where to Cut: If you are unsure about how much to trim, err on the side of caution and only remove a small amount. It’s better to trim too little than too much. You can always trim more later.
The Importance of Regular Nail Maintenance:
Regular nail trimming is not just about aesthetics; it plays a vital role in your dog’s health and well-being. Overgrown nails can lead to a variety of problems:
- Discomfort and Pain:
Long nails can press uncomfortably against the ground when your dog walks, causing pain and altering their gait.
- Altered Gait and Posture: To compensate for the discomfort, dogs with overgrown nails may walk unnaturally, putting stress on their joints and muscles. This can contribute to the development of musculoskeletal problems over time.
- Risk of Injury: Long nails are more prone to snagging on carpets, furniture, or outdoor surfaces, which can lead to painful tears or breaks.
- Deformed Feet:
Chronic neglect of nail trimming can cause the toes to splay and the feet to become deformed.
- Ingrown Nails:
In some cases, overgrown nails can curl under and grow into the paw pads, causing significant pain and infection.
The frequency of nail trimming will vary depending on your dog’s breed, activity level, and the surfaces they walk on. Dogs who spend a lot of time on hard surfaces may naturally wear down their nails more than those who primarily walk on soft grass. As a general guideline, most dogs need their nails trimmed every few weeks to once a month. You’ll know it’s time for a trim when your dog’s nails are touching the ground when they stand or when you can hear them clicking on hard floors.
Seeking Professional Help:
If you feel uncomfortable or unsure about trimming your dog’s nails yourself, don’t hesitate to seek professional help. Veterinary technicians and professional groomers are experienced in safely and efficiently trimming dog’s nails. They can also provide guidance and tips for you to eventually manage this task at home if you desire.

Conclusion: Empowering Yourself for Safe Nail Trimming
Learning how to trim a dog’s nails without hurting them is a valuable skill for any dog owner. By understanding the anatomy of the nail, utilizing the correct tools, creating a calm and positive environment, and following a step-by-step approach, you can make this essential grooming task a safe and stress-free experience for both you and your beloved canine companion. Remember that patience, consistency, and positive reinforcement are key to success. With practice and a gentle approach, you can ensure your dog’s paws remain healthy, comfortable, and happy for years to come.